1. Login to Your Control Panel
- Access your control panel by logging in using the credentials provided by your VPS hosting provider.
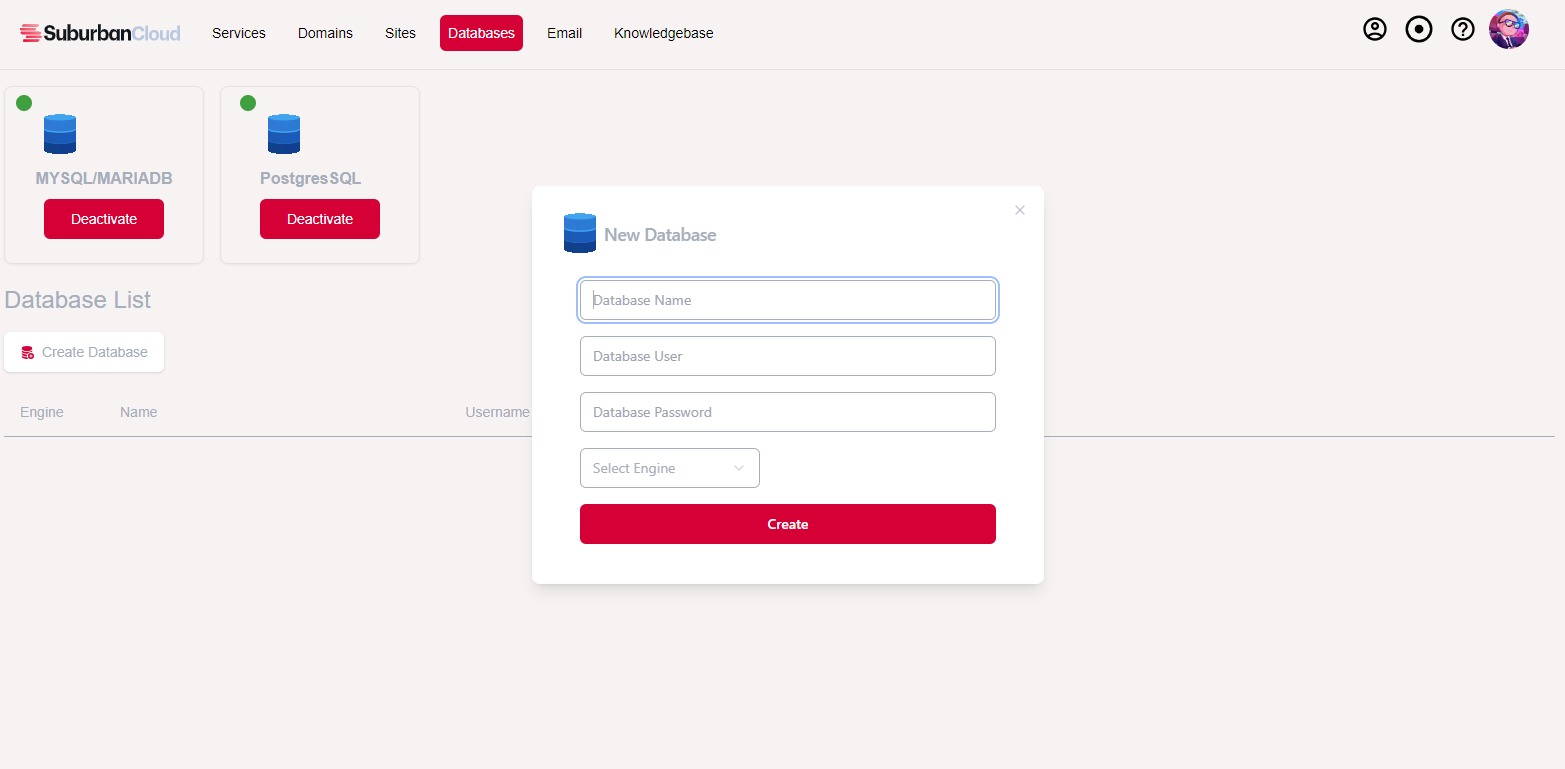
2. Create a Database for WordPress
-
cPanel:
- Go to the MySQL Databases section.
- Create a new database.
- Create a database user and assign it a password.
- Add the user to the database and give it all privileges.
-
Plesk:
- Navigate to Databases.
- Create a new database.
- Assign a database user and password to the database.
-
Note the database name, username, and password—you'll need these for WordPress configuration.

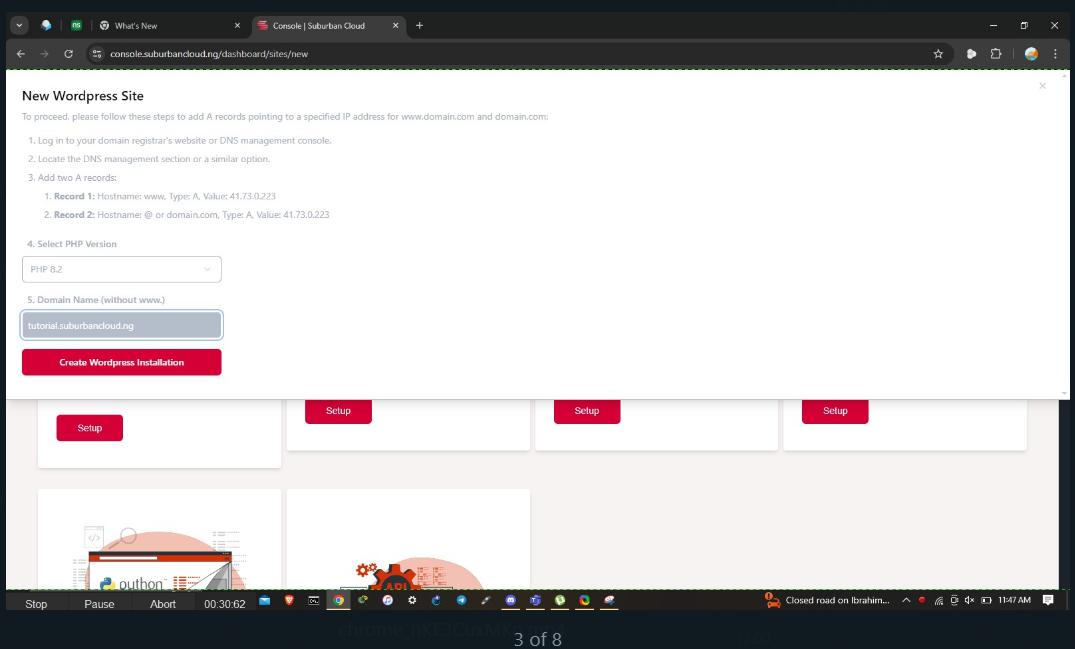
3. Upload WordPress Files
- Download the latest version of WordPress from the official website WordPress.org.
- Use File Manager in your control panel or an FTP client (like FileZilla) to upload the WordPress files to your VPS.
- File Manager:
- Open File Manager in your control panel.
- Navigate to the directory where you want to install WordPress (usually
/public_htmlor/var/www/html). - Upload the WordPress
.zipfile and extract it.
- FTP:
- Connect to your server via FTP using credentials from your control panel.
- Upload and extract the WordPress files in the target directory.

- File Manager:
4. Run the WordPress Installer
- In your browser, visit the domain or IP address where you uploaded WordPress (e.g.,
http://yourdomain.comorhttp://your-server-ip). - This will start the WordPress installation process.
- Choose your site language, and follow the on-screen instructions.
- When prompted, enter the database details (name, user, password) that you created earlier.
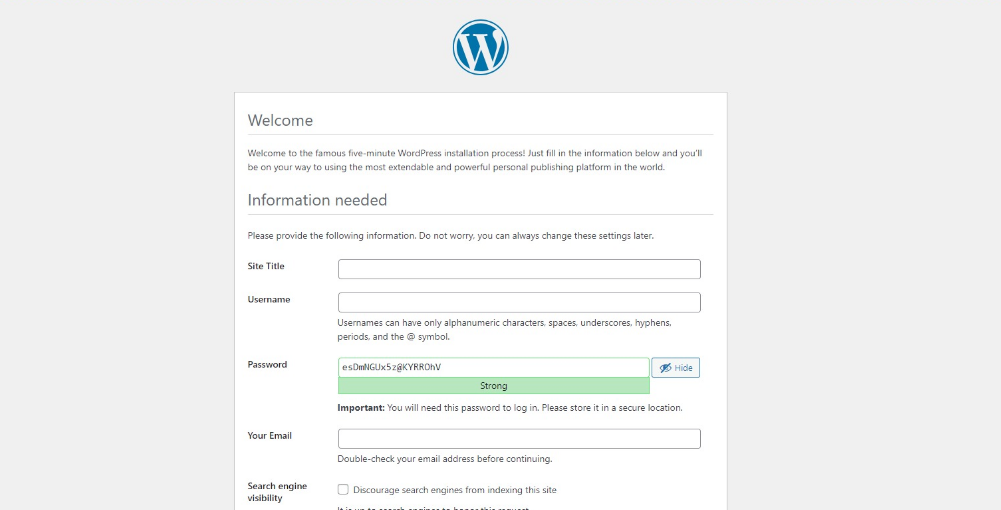
5. Complete the Installation
- You will be asked to provide details such as:
- Site Title
- Admin Username
- Password
- Admin Email
- Click on Install WordPress.

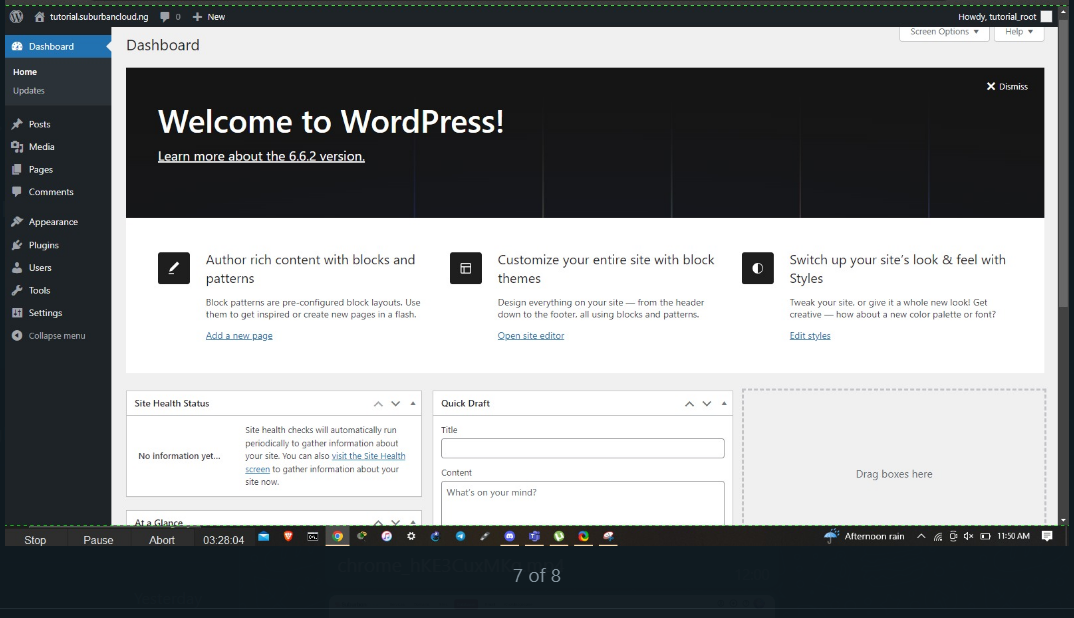
6. Access the WordPress Dashboard
- After successful installation, you can log in to the WordPress dashboard by visiting
http://yourdomain.com/wp-adminorhttp://your-server-ip/wp-admin. - Use the admin credentials you set up during the installation.

Optional Steps (depending on your needs):
7. Install SSL Certificate
- In your control panel, look for SSL/TLS management and install an SSL certificate for your domain.
- If your host provides Let’s Encrypt, you can use that to get a free SSL certificate.
8. Optimize Your Server
- Install caching mechanisms, such as WP Super Cache or W3 Total Cache, to improve performance.
- Consider using a CDN (like Cloudflare) for better speed and security.
9. Security Enhancements
- Change the default
wp-adminURL for better security. - Install security plugins like Wordfence or iThemes Security.
With these steps, you should be able to deploy WordPress on your VPS through your control panel. Let me know if you need more specific instructions or if you're using a different type of control panel!
